Tag Archives: gluten free cheesecake recipe

  • -

Jalapeno Chickpea Lentil Burgers With Sweet Mango Avocado Pico Vegan, Gluten1

Tags : 

Jalapeno Chickpea Lentil Burgers with Special Mango Avocado Pico vegan, gluten-free
It really thought just like a Summery Cinco de Mayo weekend, didn’t it?
I spent the spouse of it with my face within a bowl of potato chips and guac… like you would expect anything less from me. I’m just going to end up being honest and say that I’m wishing to repeat it every single weekend for the rest of my entire life.
But seriously.
I can’t tell you how much I’m looking forward to Summer time. My ears are longing for Lana Del Ray and outdated Mariah Carey beats.
Everyone knows Minnesota summers are the Ideal EVER! Most likely because we endure a solid six months of Winter? However, a completely irresistible 90 days are just around the corner. I can’t wait to lounge by the lake and catch the pink-painted sunsets with a drink at hand. YUM!
Anyway I had been thinking we’d start enjoying the flavors of Summer just a little early using a bit of mango avocado pico and burgers filled with fresh flavors. I already know you’re down.
(Unless you know what that means, the just produce the burgers and enjoy how freaking healthy mouth watering they’re.)
Again, I don’t know what’s up with the slew of vegan recipes on my blog page, but lately most of what I’ve been creating just happens to fall into that category. Like I talked about last week, I’m definitely not vegan… heck I’m not even a vegetarian! I ate a massive omelet with mozzarella for dinner last night as well as the additional week I needed lamb meatballs. Just in case you were curious.
Anyway Perhaps that is my chance to prove to you that healthy CAN BE and it is super freaking mouth watering. And yes the term ‘very freaking delicious’ is certainly my new favorite. But really if you haven’t attempted lentils, they are to pass away for! I love them in salads, but since I just had crimson lentils in my cupboard, I opted to create burgers. Red lentils they have a tendency to become mushy when cooked, so they’re extremely best for burger producing! You can find out about how to correctly make lentils here
These burgers are filled with spices and herbs: chili powder, cumin, crimson pepper flakes, cilantro AND jalapeno. Total goodness. And the pico? It is the most magical matter I’ve ever put on a burger.
I hope you’re convinced!
Calories from fat: 225
Fat: 6.1g
Carbohydrates: 34.9g
Glucose: 7.7g
Fiber: 12.7g
Protein: 9.6g
Prep time:
15 mins
Cook period:
10 mins
Total time:
25 mins
Ingredients
1 tsp floor cumin
1 tsp chili powder
1/2 cup packed cilantro
2 garlic cloves, minced
1/2 little red onion, minced
1 reddish colored bell pepper, very finely diced
1 large carrot, very finely chopped or shredded
1/4 cup oat bran or oat flour, gluten free cheesecake bites-free if desired
Lettuce or Hamburger Buns, to put patty in
For pico:
1 ripe avocado, diced
1/2 cup chopped cilantro
sea sodium, to taste
Instructions
To make mango avocado pico: Place almost all ingredients within a bowl and stir to mix. Add sodium to taste. Place in refrigerator until ready to serve.
Place a moderate saucepan over medium high heat, increase lentils and 1 1/2 cups of water; bring water to some boil, then cover, reduce high temperature to low and simmer lentils for about 10-15 moments or until the liquid is absorbed and lentils are very soft and a little bit mushy. Drain any unwanted water and set aside.
Place the chickpeas, cooked lentils, garlic, cilantro, sea sodium, cumin, and chili powder in a food processor and blend until the beans and lentils have become smooth.
Transfer mixture into large dish. Mix in onion, jalapeno reddish pepper and carrot. Flavor and adjust seasonings as necessary. Add in oat bran just a little at the same time, and function into mixture together with your hands. You want to be able to type patties, but you don’t want an excessive amount of oat bran, or the burgers will break apart. Therefore use just as much as you feel required. Because these burgers do not use an egg to bind them, you’ll have to strongly form the patties but nonetheless keep them quite thick in order that they don’t very easily fall apart. Separate into 6 equal portions and shape into thick patties together with your hands.
Heat skillet over medium high heat; add a 1/2 tablespoon of essential olive oil (occasionally I squirt both sides of the burger with olive oil cooking spray too). Place a few burgers in at the same time and cook for a few mins on each side, or until fantastic brown and sharp. Repeat with staying patties and continue steadily to add essential olive oil as needed.
Place patties in lettuce or in a bun and top with mango avocado pico.
It is possible to freeze burgers. Basically individually wrap and place in refrigerator. They should keep for about a month.
I really like these burgers with a dollop of greek yogurt or sour cream (not vegan).
Serve in lettuce or on a bun of preference. Calorie count does not consist of bun or lettuce.


  • -

Brown Butter Snickerdoodle Cookies1

Tags : 

Oh hi. It’s finally Friday and I couldn’t be happier!
Why? Um, because it is the weekend which means I can cook the five butternut squashes sitting on my counter-top, drink wine, definitely bake a cake or something, YouTube Joe Biden’s have a good laugh through the debates, catch up on Dexter, go directly to the apple orchard and make pie, get yourself a pedicure, run until my hip and legs fall off because my best friend just explained we’re running a race in FOURTEEN DAYS, consume a kale salad because I’m wanting to become healthy, and perform the obvious stalking of Trader Joe’s for a good two hours. No biggie.
Yet another thing that needs to be added to my large to-do list? ABSOLUTELY making more of the cookies. Significantly, snickerdoodles… with dark brown butter! We need to have a discussion about these infants.
These are extraordinary snickerdoodles. And when I mean outstanding, I mean which they flavor like no various other snickerdoodle on earth.
WITHIN THE FREAKING WORLD.
Update: Here is a fun video We made with Gold Medal Flour on how to make these Dark brown Butter Snickerdoodles!
Okay… I am sorry for that writing in caps, I just drank a go of espresso and watched the politics debates thus I’m a little hyped up and I don’t also follow politics. I usually simply make cookies for political watching parties and pretend like I understand what’s going on. But I have no idea was it simply me, or was that issue seriously entertaining?
Anyway let’s make contact with the cookies, because from what I can tell you men really, enjoy my cookies THEREFORE I can’t actually disappoint you now; Personally i think like I’ve something I have to live up to!
Now In the event that you aren’t familiar with just what a snickerdoodle is, it’s traditionally a sugar cookie rolled within a cinnamon-sugar combination with the addition of cream of tartar in the dough for your little bit of tang flavor. They’re amazing, and I swear there’s just something about snickerdoodles which are comfortable and comforting for this time of year.
I used darkish sugar in my own dough, because frankly, it’s amazing and I discover that a higher proportion of dark brown glucose vs. granulated sugars always makes a cookie more chewy and wealthy with that small hint of a caramel flavor. Needless to say I used an extra egg yolk for richness and added dark brown butter too! I find that dark brown butter is sort of a necessity in existence; it brings a striking flavor and acts like man-bait. I am serious by the way.
Unless you know how to brown butter, I’ve created a step-by-step tutorial to show you how to make the magic happen.
Ingredients
1 teaspoon baking soda
1/2 teaspoon cinnamon
1¼ cup packed dark brown sugar
1/2 cup granulated sugar
1 teaspoons vanilla extract
For rolling mix:
1/4 cup sugar
2 teaspoons cinnamon
Instructions
Whisk together the flour, baking soda pop, cream of tartar, 1/2 teaspoon cinnamon, and sodium in a bowl and reserve. Melt butter inside a saucepan over moderate warmth. The butter will begin to foam. Be sure you whisk regularly during this process. After a short while, the butter will quickly brown on the bottom from the saucepan; continue to whisk and remove from temperature when the butter begins to brown and present away a nutty aroma. Instantly transfer the butter to some dish to prevent burning. Reserve to cool for a couple minutes.
With a power mixer, combine the butter and sugars until thoroughly blended. Beat within the egg, yolk, vanilla, and yogurt until combined. Add the dry ingredients gradually and beat on low-speed just until combined.
Chill your dough for 3 hours or so long as possible in the refrigerator (important!), or place in freezer for thirty minutes if you are super willing, although I cannot promise the same results if you do this. Fridge is always best! You would like the dough VERY cold. If you require a ‘puffy’ cookie, place them in the fridge overnight.
Preheat the oven to 350 levels F. Once dough is chilled measure about 2 tablespoons of dough and roll right into a ball. Meanwhile mix 1/4 cup sugar and the 2 2 teaspoons cinnamon inside a bowl. Roll balls in cinnamon-sugar combination. Place dough balls on cookie sheet, 2 ins apart.
Bake the cookies 8-11 minutes or until the edges of the cookies commence to change golden brown. They’ll look a bit underdone in the middle, but will continue to cook once from the range. Bake longer if you want crispier cookies. Great the cookies within the sheets a minimum of 2 minutes. Take away the cooled cookies from the baking sheets after a few minutes and transfer to some cable rack to great completely. Do it again with remaining dough.
3.1.09
Karin Engel
Hi Monique!
I just made these cookies. The batter was delicious, but my cookies came out flat, not thick and chewy like your images showed. Any tips for next time?
Hi Monique!
I love your blog and cookies. I’m confused at step 4 4 though, roll them into balls, flatten them, and then move them in sugars mix? I’m not sure when I will flatten them?
My cookies arrived completely flat last night when I made them. I chilled them for 30 min, but observed they weren’t that frosty and the dough was still very soft- how chilly should they become? And could that be the reason they arrived flat?
Hi Jill!
Can you tell me in the event that you left the cookies in rounded balls? Or did you flatten them at all? Let me know.
hi monique! these are the very best snickerdoodles I’ve ever tasted… and that is saying a whole lot! I have some questions for you personally!
1. I premade a large batch of brownish butter. should I still use 1 glass of dark brown butter or less (to account for evaporation etc when food preparation the butter)?
2. I wish to make a ton of cookie dough & then freeze it for later. is this an awful idea? (if not, must i still bake for once & temperature?)
3. I’ll dispatch some cookies to close friends for the holidays. how long perform they last once cooked?
Hi! That’s a really good issue! I would say use about 3/4 of the cup. Or on the other hand it is possible to measure out just how much butter you have finally and figure out how many sticks you utilized to convert.
2. Freezing is a great idea. I would thaw out the dough a little before baking so you have the ability to move them into balls. They may also need additional time to bake.
3. They will last 4-5 days in an airtight pot, but of course are best offered warm.
– I’m a total sucker for cloves, so I added some to the dough as well as a pinch of ginger. Mouth watering!
– Maybe it’s because I used baking powder by mistake, my cookies are keeping their rounded tablespoon shape very nicely. They’re simply small nuggets of chewy, cinnamony goodness – I like the look!
– Nothing wrong having a lovely cookie, but I added a little salt to the cinnamon-sugar coating at the end just to take a small of the lovely edge off.
I just confusing my dough! I place it into the fridge since I will not be baking until nearer to Christmas. But let’s just talk about browned butter… Oh my gosh! The smell… I can’t even describe it! Lol!
This was my first time browning butter. I wasn’t sure that it was ever likely to convert but all of a sudden there is that heavenly (caramel) nutty smell you defined! Nomnomnom! I cannot wait around to bake these up!!!
These cookies are ahhhmazing! I simply made them last week, and posted about any of it on my blog page ( ) They were gone in less than a day!!
Just made these today. I am not really a lover of traditional Snickerdoodles because they will have the taste of glucose cookies, that i don’t like. I love brownish butter in cookies which is why I decided to give these a go to begin with. The mix of brownish butter and darkish sugar is amazing!
As an email to those who have had problems with flat cookies: I am in Utah so I am always having to adjust formulas for thin air (which for cookies results in increasing the flour by 1/4 glass for every 2 cups inside a recipe). The dough for these cookies looked right, so I decided not to add additional flour and find out what occurred. I increased the oven heat range by 15 levels (something I discover fixes the flat cookie” issue as well) and cooked the first skillet. The cookies came out perfect! So, if you are having a set cookie” problem try raising the flour by 1/4 cup and increasing the oven temp by 15 degrees.
The only issue I had fashioned with flattening was after i accidentally fell my test-baked cookie sheet rather hard on the stove after pulling through the oven. They proceeded to go from puffy to flatter than a pancake in less than another.
First off, they are delicious, but I favor my snickerdoodles with a little more height. Mine were very smooth once cooled, nothing like the picture. I chilled the dough for 5 hours and followed the recipe precisely. :/
If I may add my 2 cents… I weight my flour and 2.5 cups is supposed to be add up to a little more than 10.5 oz (4.25oz/cup). But, if the formula was created by basically scooping and packing flour into a calculating cup, then there is definitely more than 10.5 oz of flour within this recipe for gluten free cheesecake crust. Although, I believe the formula actually has a too much butter (gasp I understand) and requirements the full 2 eggs. I think browning the butter and using brownish sugar is normally genius, but the next time I am going to make use of 1.5 sticks of butter, 2 eggs, and decrease the brown sugar to at least one 1 cup. I believe many of these items will make to get a somewhat taller cookie.
are
I simply made these cookies. WOW! the dark brown butter makes all of the difference. Therefore tasty and yummy. There were two things I had been a little puzzled about. You state 1/2 cup sugar in substances and then for the glucose cinnamon combination you add 1/4 glucose. I assumed this was as well as the 1/2 cup in the cookies. Turned out fine. Also you don’t state whether a greased or ungreased cookie sheet. I sprayed mine with pam in the event. I added mini chocolates chips and a 1/4 teaspoon each of surface cloves and nutmeg.
The flavor of the is very unique and amazing. Everyone adored them. I chilled mine in refrigerator for 5-6 hours. They arrived slightly much less puffy compared to the ones pictured. So i’d say right away is probably best.


  • -

Fat Pumpkin Oatmeal Chocolate Chip Muffins1

Tags : 

Besides my food shopping obsession, I have a couple other little addictions.
One is the internet. Twitter specifically; I just love it! Also now that I’m finally obtaining an iPhone, (I can’t even talk about it), I’ll oftimes be bonkers obsessed with Instagram and every app that I’ll more than likely neglect what it’s like to function as a real human being. I mean, it’s already hard enough for me personally to keep up challenging new blogs I am discovering online lately. My new favorite is A LOVELY Mess , a blog about everything from beauty and fashion, to crafts and pictures. You totally need to take a look!
Another favorite is certainly my pal Stephanie’s blog Frest Tart Her unbelievably beautiful food photography, recipes, and fun composing design immediately invites you in. Stephanie also photographs Andrew Zimmern’s quality recipes for Meals & Wine Journal rendering it a lot more fun to check out what she’s as much as! Visit and inform her hello!
Mmmmm now I’m thinking about brown butter. But wait… these muffins don’t actually have any butter OR oil in them! Whatttt?!?! I understand, I must clarify.
You guys understand that I just about love everything in bread form; nevertheless, I realize that I can’t go around eating muffins in the bakery every morning! So, in order to diminish my morning carb cravings, I attempt to create a guilt-gluten free godiva cheesecake muffin that would be perfect for breakfast time, an on-the-go snack and great for kids.
To keep carefully the calories low, I used minimal sugar, unsweetened almond dairy, egg whites, and applesauce. I also added in 1/2 of the ripe banana to keep carefully the muffins extra moist and to add a bit of sweetness. You can make the recipe minus the banana if you don’t have any readily available; they’ll still turn out great!
Imagine biting right into a warm, moist and chewy pumpkin muffin with bits of sweetness from chocolate chips. And then suddenly your entire day gets really awesome. Muffin magic.
And there’s another reason you’ll fall in love with them too…
They’re only 160 calorie consumption per muffin! I understand it’s shocking, but I’ve included the nutritional information using the recipe below.
Omg… I understand what you are thinking, and the answer is yes, we can totally butter these babies up!
AND BUTTER I DID. Hehe. I’m a little bit evil. Maybe in that actually sweet kind of way?
Happy baking!
Prep time:
5 mins
Cook time:
25 mins
Total period:
30 mins
Ingredients
1 cup oatmeal
1/2 teaspoon baking soda
1/4 teaspoon salt
1 cup canned pumpkin
1/2 ripe banana, mashed
Extra oatmeal, for sprinkling on muffins
Instructions
Preheat the oven to 350 degrees and series 12 muffin cups with paper mugs or spray with nonstick aerosol. If you use muffin cups, be sure to spray the inside of the cups.
In a large bowl mix flour, oatmeal, pumpkin pie spice baking powder, baking soda, and salt jointly. In a separate bowl combine pumpkin, mashed banana, brownish sugar, almond dairy, egg whites and applesauce. Add the flour mixture into the pumpkin combination and stir to combine. Gently flip in chocolate chips.
Fill each muffin glass 3/4 full so that each is actually. Sprinkle a tiny bit of oatmeal over each top of the muffins. Place into the range and bake for 23-28 minutes or until a toothpick put into middle of muffins comes out clean. Muffins are greatest served warm. Reheat in the microwave for 20 mere seconds and pass on with topping of your decision!
3.1.09
Monique,
Talk about an excellent photographer! Your photos are excellent. Can’t wait to try these muffins. Stated it before, will state it once again….love your blog! Love your passion for cooking, baking, food and composing! Superb!
Hi!
Simply made those yesterday and they’re AMAZING. Everyone adored them so when I informed them it was only 160 calorie consumption…I produced their day hahaha.
Got a issue though; just how long can you maintain them before they obtain mouldy?


  • -

Healthy Cookie Dough Peanut Butter Protein Balls1

Tags : 

Happy Brand-new Year, friends! Today marks my last day time bathing in the Florida sunshine! Can’t wait to tell you about it soon.
For the time being, I have been waiting to bring you these AMAZING peanut butter protein balls (that taste such as a a mix between cookie dough along with a peanut butter cup) since past due October. The timing just never felt right challenging vacation goodies. I’m sure you’re a lot more than ready for them right now. Am I right?
I’ve been tweaking this recipe since a minimum of last August, when these balls first began as protein bars. I certainly enjoyed them, but wasn’t in love with this. Since then, they’ve been tested with the majority of my homemade nut butters, several brands of proteins powder and some different flavors. Ultimately, this version emerged as the accurate winner and now I love to think of them because the poster kid of healthy, easy snacking. No grains, low carbohydrate, healthy fats, no glucose added, and an excellent mixture of both proteins and fiber.
Truth be told, this probably is one of my most favorite snacks on your blog AND they just take five minutes to make.
I do want to inform you a bit more in regards to the diet & elements in these peanut butter balls, because I’m such as a Mom when it comes to recipes. I really like guiding you along so that you’re always ready & informed.
First things, 1st may be the peanut butter! You will want to make use of a natural drippy peanut butter. I like Trader Joe’s peanut butter made with only roasted peanuts and salt. Another favorite can be Santa Cruz Dark Roasted Peanut Butter because it tastes like silver (if which were a thing).
Next up may be the coconut flour. Although you’ll only need a little amount, it is critical in the formula. I do suspect you could get one of these gluten free cheesecake free oat flour, but no claims on that!
BONUS!
DO YOU KNOW WHAT?! Because I love you guys so much, Aloha offers generously agreed to offer 20% off purchases of $50 or more through 1/31/16! All you have to do is utilize the code ‘ambitiousaloha’ at checkout.
I can’t wait to find out you all produce some of these balls. That’s a odd statement, but therefore true. Snap a photo and be sure to tag #ambitiouskitchen on Instagram so I can see your lovely masterpieces! xo.
Healthy Cookie Dough Peanut Butter Protein Balls
Calorie consumption: 135
Body fat: 9.2g
Sugars: 5.9g
Sugar: 2.3g
Fiber: 1.7g
Proteins: 5.5g
Recipe type: Snacks, Protein, Gluten Free of charge, Dairy Free of charge, Grain Free of charge, Paleo
Prep period:
5 mins
Total period:
5 mins
Ingredients
3/4 cup natural drippy peanut butter (any nut butter will continue to work)
1 tablespoon coconut flour, plus much more if necessary
1/2 cup protein powder (I used Aloha Vanilla Protein Powder)
1 teaspoon vanilla extract
2 tablespoons delicious chocolate chips
Instructions
In a large dish, add all ingredients except chocolate chips. Mix together using a solid wood spoon until substances are well combined and resemble a gentle cookie dough. If it seems to dry add a teaspoon or two even more almond milk. If too damp, put in a teaspoon more of coconut flour. (The key note is that you will want to be able to move the dough into balls that stick together well.) Stir in chocolate chips, then move into 12 tablespoon size balls. Transfer for an airtight container and shop in refrigerator. Makes 12 balls.
To create vegan: Make use of vegan chocolate chips such as enjoy life, or leave out chocolate chips completely.
Nutrition without chocolate chips: Calories: 123 Fat 8.6g Carbs 4.4g Fibers 1.5g Sugar: 1g Protein 5.5g
I recommend using Aloha’s proteins powder which is seed based and made without stevia (they use a little bit of coconut sugar). It’s my absolute favorite vegan protein powder on the market and makes these balls amazing. If you decide to make use of another protein powder, make sure that it’s natural, no sugar added and clean.
Formula by: Monique Volz // Picture taking by: Sarah Fennel
For much healthier and delicious treat formulas, follow my Healthy Snack plank on Pinterest:
Ok just whipped these up and I’m pleased with how they came out! Made a couple of modifications with what I had on hand, but in case anyone else was thinking, peanut flour lends itself well in this formula for the proteins natural powder, or at least section of it (I utilized half peanut half something else)
Glad these aren’t lovely- they’re an ideal pre-/post-workout snack for me!!


  • -

Healthy Blueberry Zucchini Muffins1

Tags : 

So I know, zucchini is not actually in season in January; it’s more of a summer vegetable. However, I purchased several last week before vacation because they were pretty inexpensive in the grocery store AND because I had been planning on making stuffed zucchini. Well, of course things never go as planned and I never had the opportunity to use them up before I remaining.
Admittedly, I really like baking with zucchini simply because I feel it eliminates the necessity for excess oil or butter in recipes. Typically the zucchini provides plenty of moisture to slice most fat in half and add extra fibers and nutrition. Soon I’ll find a way to incorporate it into some gluten Free cheesecake recipe free goodies. Promise.
These blueberry zucchini ones are 100 % pure precious metal among muffins. They’re made with whole wheat grains (I used white whole wheat grains), genuine maple syrup instead of glucose, applesauce and zucchini to displace most of the excess fat in the formula, cinnamon and a mix of both vanilla and almond extracts for a significantly addicting and healthful muffin. On top of that – they’re LOADED with blueberries. I made Tony try one before he left for work 1 day. He known as me 5 minutes later to tell me how delicious these were (despite having the zucchini!).
I noticed that they improved and better because the days go passed; you can also freeze them for occupied mornings! I loved mine spread having a salted almond butter
Ps. If you are any thing like me and buy zucchini in winter season, here are some other recipes you may like: slim zucchini banana delicious chocolate chip , double zucchini delicious chocolate chip muffins and almost paleo zucchini brownies ! xoxo.
Good Morning Healthy Blueberry Zucchini Muffins
Prep time:
10 mins
Cook time:
20 mins
Total time:
30 mins
Ingredients
1 1/2 cups white whole wheat grains or whole wheat pastry flour
1 teaspoon cooking soda
1/2 cup real maple syrup (or honey)
1 teaspoon vanilla extract
1/4 teaspoon almond extract
2 tablespoons olive oil
1/3 cup unsweetened applesauce
3/4 cup fresh or frozen blueberries
Instructions
Preheat oven to 350 degrees F. Collection a 12 glass muffin pan with nonstick cooking spray or range with muffin liners. Either way I would recommend using nonstick cooking food spray. This guaruntees they muffins will not stick to the liners or the pan.
In a big bowl combine the dry ingredients: flour, baking soda pop, cinnamon and salt; set aside.
In another medium bowl, combine the following wet ingredients:zucchini, maple syrup, vanilla and almond extract, olive oil, applesauce, egg and milk until well combined. Add to dried out ingredients and mix until just mixed. Gently flip in blueberries.
Even distribute batter among muffin tins, filling on the subject of 3/4 of the way full. Bake for 19-22 mins or until toothpick inserted into the middle of the muffin arrives clean. Cool on cable rack for ten minutes then remove muffins and transfer to wire rack to finish air conditioning. Makes 12 muffins.
Muffins can be frozen; separately wrap muffins in ziploc luggage or store them in a big freezer bag. Reheat for 30-45 mere seconds in the microwave or simply thaw them at room temperature.
To make vegan: Work with a flax egg rather than a poultry egg.
Hi Monique,
Is almond extract a must? I don’t believe there’s any available where I live. Is there a substitution?


  • -

Healthy Blueberry Greek Yogurt Scones1

Tags : 

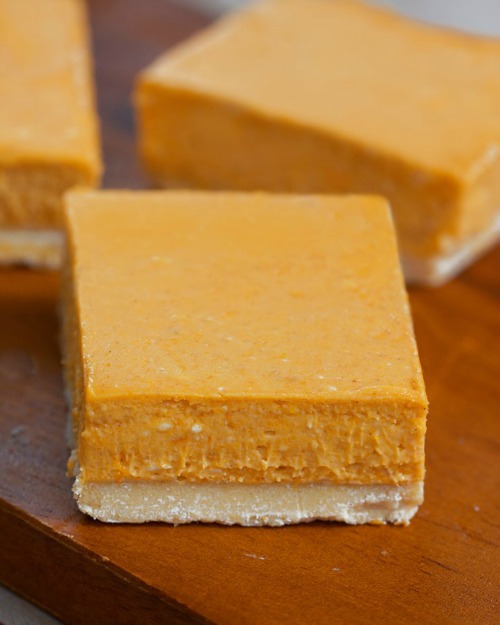
Over the past three months, I’ve been on a real fruit obsession. Fruit smoothies, shakes, muffins and jams galore! In the event that you keep in mind, I even place blueberries within a cookie (OMG so good!).
One fruits I’m absolutely in love with are the organic braeburn apples from Trader Joe’s. They’re one of my favorite healthful snacks particularly when dipped in peanut butter or vanilla greek yogurt. Personally i think so lucky when I find them because they have the sweetest flavor and best crunchy consistency. Lord knows I’m already excited for apple season therefore i can bake up my well-known apple crisp and warm-up some hearts.
Since we’re not in to the Fall season just yet, I felt like it was a little too early to start busting out apple quality recipes. So today I’m bringing you a wholesome, lightened up wholegrain scone bursting with the nice blueberries I found at my regional farmer’s market previously come early july. They’ve been in my freezer for the past month and I was wanting to utilize them up!
This was actually my first-time tinkering with scones and it definitely won’t be the final. The crumb was quite ideal- therefore fluffy and moist from your greek yogurt. The outside has a wonderful crunchy texture which was irresistible; it tasted just like the best of the blueberry muffin. The very best part is these healthy ones definitely melt in the mouth area as being a buttery scone would. Try dipping them in just a little coffee. TO DIE FOR.
I considered glazing them, but they’re quite perfect as is. Not really too lovely, but a thing that you could enjoy for breakfast time or packed for a guilt-gluten free hazelnut cheesecake crust lunchtime or snack.
I used just a little of butter in these, but you could try using coconut essential oil instead. I don’t see it making a lot of a difference. Jazz up these scones by adding a squeeze of clean lemon juice or some vanilla beans.
Enjoy! xo
Ingredients
2/3 cup all purpose flour
1/2 cup whole wheat pastry flour or white whole wheat grains
3 tablespoons brownish sugar
1 teaspoon baking powder
1/2 teaspoon cooking soda
1/2 teaspoon vanilla
3 tablespoons butter
1 egg white
Cooking spray
Preheat oven to 400 degrees F.
In a small saucepan, brown the butter over moderate high heat. If you are unfamiliar how to do this, I’ve produced a step-by-step tutorial Unless you feel just like browning it, it is possible to just melt and great the butter, or make use of softened butter.
In a big bowl, whisk collectively both flours, brown sugar, baking soda, baking natural powder and salt.
In a small dish, combined greek yogurt, vanilla, butter, and egg white. Add damp ingredients to dry ingredients and stir until just moist. Mixture ought to be crumbly. Gently flip in blueberries.
Change dough onto a lightly floured surface area and knead about 8 moments together with your hands. Dough will quickly come together. Form dough right into a 6-8 inches circle and put on baking sheet or parchment paper coated with food preparation squirt. Cut into 6 wedges and hardly separate.
To make the topping, combine sugars and cinnamon. Spray the top from the dough with cooking food spray after that sprinkle the top of the dough using the cinnamon sugars blend. Bake for 15-20 mins or until top of the scones are gently golden brown.
Feel free to work with a flavored greek yogurt.
Try adding raspberries or strawberries rather than blueberries! You can even use dried fruits.
Abby
I’m new to the cooking world but tried these today and LOVE the way they turned out, will definitely be tinkering with even more of your dishes:)
Hi Monique,
We made these plus they turned out so good!! Can’t believe they in fact turn out like a true scone. Next up, I had been thinking easily can replace the the butter with applesauce.. Would that end up being unthinkable? Or worth a go.?
Hi Monique,
i do not like the width of greek yogourt for feeding on, so i do not have it around…however, i really do usually have simple yogourt within the fridge, therefore i just place some in a little sieve for about an hour prior to making these, and lots of liquid drained out and gave me the width required!


  • -

Fat Pumpkin Oatmeal Chocolate Chip Muffins1

Tags : 

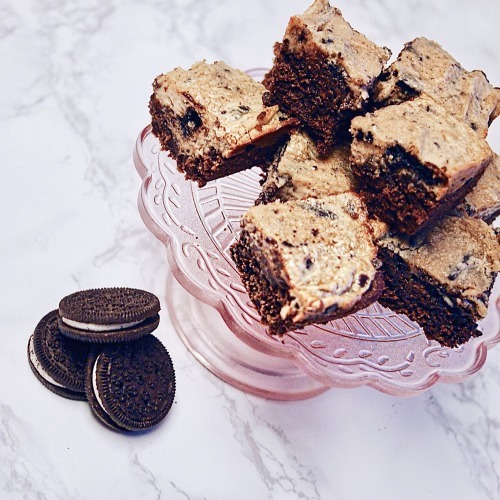
Besides my grocery shopping obsession, I have a few other little addictions.
One may be the internet. Twitter specifically; I just think it’s great! Also now that I’m finally obtaining an iPhone, (I cannot even discuss it), I’ll oftimes be bonkers obsessed with Instagram and every app that I’ll probably ignore what it’s like to function as a real human being. I mean, it’s already challenging enough for me to maintain challenging new blogs I’ve been discovering online recently. My new preferred is A LOVELY Mess , a blog page about everything from beauty and fashion, to crafts and photography. You totally need to take a look!
Another favorite is my friend Stephanie’s blog Frest Tart Her unbelievably beautiful food photography, quality recipes, and fun writing style immediately invites you in. Stephanie also photos Andrew Zimmern’s formulas for Food & Wine Magazine which makes it a lot more fun to check out what she’s as much as! Visit and inform her hello!
Mmmmm now I’m thinking about brown butter. But wait… these muffins don’t already have any butter OR essential oil within them! Whatttt?!?! I understand, I must explain.
You guys know that I virtually love everything in bread form; however, I recognize that I can’t bypass eating muffins through the bakery every morning! So, in an effort to diminish my morning hours carb urges, I set out to create a guilt-gluten free cheesecake recipe easy muffin that would be perfect for breakfast, an on-the-go snack and great for kids.
To keep the calories low, I used minimal sugar, unsweetened almond dairy, egg whites, and applesauce. I also added in 1/2 of the ripe banana to keep the muffins extra moist also to add a little bit of sweetness. You may make the recipe minus the banana if you don’t have any readily available; they’ll still come out great!
Imagine biting into a warm, damp and chewy pumpkin muffin with bits of sweetness from chocolates chips. And then suddenly your entire day gets really amazing. Muffin magic.
And there’s another reason you’ll love them too…
They’re only 160 calories per muffin! I know it’s shocking, but I’ve included the nutritional information using the recipe below.
Omg… I know what you are thinking, and the solution is yes, we are able to totally butter these infants up!
AND BUTTER I DID SO. Hehe. I’m a bit evil. Maybe in that actually sweet sort of way?
Happy baking!
Prep time:
5 mins
Cook time:
25 mins
Total time:
30 mins
Ingredients
1 cup oatmeal
1/2 teaspoon baking soda
1/4 teaspoon salt
1 cup canned pumpkin
1/2 ripe banana, mashed
Extra oatmeal, for sprinkling on muffins
Instructions
Preheat the oven to 350 degrees and collection 12 muffin mugs with paper mugs or spray with nonstick spray. If you use muffin cups, be sure to squirt the inside from the cups.
In a large bowl mix flour, oatmeal, pumpkin pie spice baking powder, baking soda pop, and salt collectively. In a separate bowl combine pumpkin, mashed banana, brownish sugar, almond milk, egg whites and applesauce. Add the flour mixture into the pumpkin blend and stir to combine. Gently fold in chocolate chips.
Fill up each muffin cup 3/4 full in order that each is also. Sprinkle handful of oatmeal over each top of the muffins. Place into the range and bake for 23-28 mins or until a toothpick inserted into middle of muffins comes out clean. Muffins are greatest offered warm. Reheat within the microwave for 20 secs and spread with topping of your decision!
3.1.09
Monique,
Talk about a good photographer! Your photos are excellent. Can’t wait around to try these muffins. Stated it before, will state it again….love your blog! Love your enthusiasm for cooking, baking, food and composing! Superb!
Hi!
Simply made those yesterday and they are AMAZING. Everyone cherished them so when I told them it was only 160 calorie consumption…I produced their day hahaha.
Got a issue though; how long can you keep them before they get mouldy?


  • -

Butternut Squash And Black Bean Enchilada Skillet1

Tags : 

Now that it’s January, I realize that the majority of us are now in some fitness or wellness mission.Skinny Gluten Free Strawberry Cheesecake Streusel Bars ... I really haven’t produced any resolutions, apart from to never let myself miss out on an experience which i find interesting or challenging. However, I do believe it’s finally time for me personally to get back into the swing of things health-wise. Today I finally made it to yoga exercise after being unwell for the past week; it felt wonderful to you need to be right now there. I’m also working to eliminate all of the rubbish I ate last month – ugh, like plenty of using the cookies currently! Yep, I simply said that.
Even though I’m eating healthier, I just can’t find a reason why I would give up eating Mexican food. Why torture myself? We all know how that would find yourself – me having a plateful of nachos, a huge margarita, and a lot of guilt. Who provides up the things they love probably the most? Not this gal.
Instead throwing almost all Mexican food out the window in my quest to eat better, I try and find ways to allow it to be healthier but still delicious more than enough to create me daydream about any of it alllll day long.
Butternut Squash and Black Bean Enchiladassssssssssssssssss. OMG. Inside a freaking skillet.
Let’s discuss this magical concoction that jumped away from my mind, into the skillet, and down my stomach. …Or we’re able to just stare at photos and drool?
No, gluten free godiva cheesecake I definitely need to explain how great this dinner is certainly! It all started when I came across an extra butternut squash laying around.
If you aren’t familiar with how exactly to properly cut a butternut squash the picture tutorial below should supply you with a great example. You’ll need to peel off the squash, take off the ends, and slice it down the middle. Then merely scoop out the seed products (roasting them rocks !!), and slice the butternut squash into cubes! Just be Cautious when using your knife!
In the event that you decide that you aren’t in the mood to cube a squash, it is possible to usually purchase cubed butternut squash in the grocery store.
The butternut squash is sauted within the skillet having a bit of olive oil and onions, jalapeno, and Mexican spices until it becomes tender. Next, the black beans are added to the skillet, alongside thick cut slices from yellow corn tortillas, reddish colored enchilada sauce, plus some parmesan cheese. We’re stirring up oooey gooey enchilada love here. See?
The smells are completely intoxicating, but it’s perfectly okay to inhale it just as much as you’d like. That is right, I’m giving you permission to obtain a buzz off of producing enchiladas. Don’t take these smells for granted.
Seriously. That is my little bit of heaven.
All that’s still left to accomplish is add a bit more cheese on top of the enchilada skillet and pop it less than your broiler for a few a few minutes! How easy is the fact that?!
One portion (1/4th) of the recipe has ideal around 400 calorie consumption! Yep that’s right, you get a heaping scoop of the delicious enchilada skillet casserole with 13g grams of fiber and 16 grams of proteins too!
Make this ASAP. It’s my new favorite way to indulge.
3.1.09
Food: Mexican
Ingredients
2 teaspoons essential olive oil
3 mugs 1/2-inch-diced, peeled butternut squash (from about a 2-lb. squash)
salt and pepper, to season
1 medium yellow onion, diced
3 cloves of garlic minced
1/2 jalapeno, seeded and diced
1 teaspoon cumin
8 discolored corn tortillas, slice into thick strips
1-15 ounce can red enchilada sauce
1 cup reduced-fat colby jack or mexican cheese (or whatever you like), divided
cilantro and low-fat sour cream, for serving
Instructions
Heat essential olive oil over medium-high temperature in huge oven-proof skillet. Add onions, garlic clove, and jalapeno and prepare 2-3 mins until onions become translucent and garlic is definitely fragrant. Add cubed squash, cumin and chili natural powder and time of year with salt and pepper. Make, stirring occasionally, until the squash is slightly tender, 10-13 minutes. You need the squash to become fork tender, but not so tender it starts to break apart and be mush.
Next insert the black coffee beans, corn tortilla items, and will of enchilada sauce and mix to combine. Reduce temperature to medium-low and sprinkle in 1/2 glass of cheese. Mix once again and simmer for a couple minutes. Turn on your oven broiler to high. Sprinkle yet another 1/2 cup of cheese outrageous from the enchilada mixture and place in oven under broiler for 3-5 minutes until parmesan cheese melts and tortilla sides become a tiny golden brownish. Remove from heat and serve instantly. Feel absolve to add in cilantro. Serve with sour cream, guacamole, or popular sauce! Enjoy!
Formula by: Monique Volz // Ambitious Kitchen Photography by: Sarah Fennel // Broma Bakery
Evie
Happy (belated) New Year!
Would you recommend roasting the butternut squash halves before placing it in to the skillet?
Incredible! I had to utilize flour tortillas rather than corn, nonetheless it was still great. And I experienced so good eating it, knowing the main ingredient was this type of nutritious vegetable.
My only concern was the quantity of sodium in the enchilada sauce, combined with the added table salt as well as the sodium in the can of black beans. Rinsing the beans helps, as well as perhaps forgetting the desk salt may help. Any concepts for reducing the sodium of the sauce? Favorite low-sodium brands?


  • -

The Best Apple Crisp Youll Ever Have1

Tags : 

Eating blueberry cheesecake in a coffee shopTHE VERY BEST Apple Crisp You’ll Ever Have with brown butter, vanilla bean, + bourbon
I was inside a food coma for an excellent 36 hours.
Obviously worth it.
A couple of months ago Joanna of the Cup of Jo asked me easily would create a recipe on her behalf simple food series. Of course, I said yes!
Initially I wasn’t sure which recipe I would talk about, but since I’ve been making the best apple crisp for a long time, I knew that was truly sensational It’s also one of my most requested recipes and for reasons uknown, men can’t seem to get enough of it. Have I mentioned that baking for men is completely romantic? You must give it a try.
This recipe always makes me love the simplicity of apple crisp yet again. I love when that happens.
Dark brown butter, vanilla bean, bourbon, and an unbelievable oat crisp in this recipe will knock your socks off. Gleam little bit of almonds in the topping, but you may use pecans or omit totally – it’s your decision.
Oh yes I did so put bourbon within this sharp, because baking with bourbon is just freaking awesome. Just do it, try the recipe and you’ll flavor the difference. PROMISE.
3.1.09
I truly can’t appear to put into phrases how fantastic this apple crisp is though. Everyone usually asks me for this recipe, and I’m sure they’ll talk to you, too! It’s best offered warm having a big scoop of vanilla glaciers cream. Enjoy!
5.0 from 1 reviews
Ingredients
½ cup cut almonds
1 stick (1/2 cup) unsalted butter, softened and lower into pieces
For the filling:
1 vanilla bean, divided lengthwise
6 medium-sized Granny Smith apples, peeled, cored, and incredibly thinly sliced
1/3 cup dark brown sugar
1 tsp. cinnamon
1 tbsp. bourbon
Instructions
Preheat oven to 350 levels F. Generously grease an 8×8 cooking pan.
To help make the topping: Combine the flour, oats, brown sugar and almonds in a big bowl until well-combined. Add in the pieces of butter and make use of your hands to press and combine until the mixture becomes crumbly and resembles moist sand. (On the other hand, you can trim within the butter having a pastry cutter, or place all of the topping ingredients within a food processor chip and pulse until just blended. My favorite method is by using my hands, as I really believe you get the best crumbly topping that way.)
Once finished, place topping within the fridge and begin building the apple filling.
To make the filling up: Place butter and seeds from your vanilla bean inside a medium saucepan, and turn warmth on medium. After a couple of minutes the butter will begin to crackle and foam-make sure you whisk consistently during this process! Another minute or two, and you’ll notice the butter turning hook dark brown (caramel) color on underneath from the saucepan; continue steadily to whisk and remove from temperature as soon as the butter starts to give off a nutty aroma. Immediately transfer the butter to some bowl to prevent it from burning up. Set aside to cool for a couple minutes.
While the butter is cooling, place apples, 1/3 cup brown sugar, cinnamon and bourbon in a big bowl and toss to combine. Add the brownish butter to the apple blend and toss again to combine.
Take a heaping ½ cup from the topping mixture and toss with the apple mixture. Place the apple mixture in prepared skillet and sprinkle equally with topping. It may look like a lot of topping, but the apples will cook down and the topping provides an excellent crunchy exterior.
Bake the sharp on a cooking sheet (in the event the filling bubbles over!) for 55-60 a few minutes, or until topping is usually golden brownish and filling can be bubbling. Remove from range and cool ten minutes on cable rack. Serve warm with vanilla bean glaciers cream.
Feel gluten free cheesecake cookies to use different nuts instead of almonds-or omit nuts completely. If you don’t have bourbon readily available, you should use whiskey, or replace with ½ teaspoon vanilla extract.
Completely aware that more and more people proclaim their versions of recipes to be the Best”…yet…THIS ONE TRULY IS…
This Apple Sharp = crack!
I actually used Fuji apples because that’s what We had in the kitchen, used rum instead and added chopped pecans which came out GREAT! I made a pan for a party recently even though it was supposed to be for dessert, it had been all eliminated before people surely got to the desserts.
This really was the very best apple crisp I have ever had. The only real adjustments I produced had been reducing the sugars in the topping by a couple tablespoons and adding a little pinch of salt. And I squeezed a little lemon juice in the apples, but which was mostly to prevent browning while I was working.
The brown butter really produced a difference. My partner, previously a chef in Atlanta, decided that this was fantastic.
Splurge on great vanilla bean snow cream to go with this for desert (no corn syrupy/fake vanilla taste kind). It’s worth it. With some plain Greek yogurt on top (2% or whole Fage Total in particular), this magically turns into breakfast, too. Or possibly only need the snow cream for breakfast time as well…
This also did effectively reheated in the oven.
This sounds heavenly! Can’t wait to try this !
Quick question, may i make this in a 9×13 pan or would I have to adjust the whole recipe?
hi,
can I just used regular, salted butter in the formula without it affecting the product quality and taste?
Simon
RObin


  • -

Cheesy Egg White Veggie Breakfast Muffins Low Carb, Gluten Free1

Tags : 

Coca-Cola FreestyleCheesy Egg White Veggie Breakfast time Muffins low carb, gluten free
Yes, the weekend is here now. I should be thrilled, but to inform you the reality, I am sooooooo tired. The thing I’m delighted about may be the chance to sleep in.
I don’t think I’ve recovered from last weekend however, plus my new job started on Monday so I am going, going, heading. Maybe I’ll consider the weekend to recover slightly bit. That is really just me explaining why I haven’t been publishing as frequently.
But here’s something to anticipate: A brand new redesigned Ambitious Kitchen! Yes, each day we’ve been plugging aside on my brand-new site! I’m excited for it to release, but without a doubt, it takes even more work than you’ll think!
Anyway since I’ve been on the go lately, I’ve needed to ensure that most of my meals and snack foods are prepared ahead of time.
Eggs are among the best foods. For breakfast, lunch, and dinner. These muffins are perfect on a british muffin, great before or following a workout, and perfect for a low-carb, gluten free cheesecake recipe free of charge snack.
The egg base is versatile, too! Optional muffin add-ins include: mushrooms, diced bell peppers, low-fat mozzarella cheese, basil, oregano, pepperoni, ham, turkey, bacon, zucchini, carrots, tomato vegetables, cilantro – the list goes on!
I usually think about my favorite omelet elements and use those (mushrooms & peppers), but it certainly is fun to test. These muffins were filled with mushrooms, colby jack mozzarella cheese, basil, and bell peppers. Of them costing only about 60 calories per muffin, I ALWAYS eat two!
The best part of these muffins? They’re like mini fritatas and are completely an easy task to make. Merely layer the vegetables and cheese you’d like to use within muffin tins, then put your egg white combine in and bake until good and golden.
Your healthy breakfast (or treat) awaits…
Prep period:
10 mins
Cook time:
20 mins
Total period:
30 mins
Ingredients
3 eggs
3/4 cup low fat shredded cheese of choice (I love cheddar, colby jack, or pepper jack)
2 tablespoons of skim milk or plain greek yogurt (not necessary, but gives them a bit of fluff)
sodium and pepper
Instructions
Preheat oven to 350 levels F. Apply 12-glass muffin tin with non-stick cooking aerosol, you can even range with muffin tins, just be sure you aerosol the inside from the muffin tins.
Fill each muffin tin 1/4-1/3 whole with vegetables and herbs of choice. Add 1 tablespoon of mozzarella cheese to each muffin tin.
In medium dish whisk jointly egg whites, eggs, and milk/yogurt. Fill each muffin to the very best with egg mix, pouring over the veggies already in each tin. Bake for 20-30 moments or until risen and slightly golden on top.
Let cool for a couple minutes, then remove from tin.
Calorie Count does not include veggies you may add
Egg muffins ought to be kept in refrigerator after baking; however they may become soggy or moist, that’s alright, they’ll still be delicious when reheated! I like to individually wrap mine.
Hey Monique,
What do you wrap these in? Foil or plastic material wrap? I just don’t want to get too much wetness within them when refrigerated.
I’d like to create these for the breakfast within my desk when i go right from gym to operate in the morning.
I would like to know if I create a batch on a Sunday just how long do they keep in the refrigerator, 2/3 days??


If you need us then send an e mail.